CASED -IN SEWING ON TAPES
This binding will require a number of carefully orchestrated steps over the course of a couple weeks, at least.
Please take your time with this project, choose materials carefully for durability and ease of use. If you decide to do a tricky design, please discuss it with me and plan to spend extra time getting through the steps (without expecting me to spend it with you, necessarily : ) -- oh, but you know I will.
A Note About Cover Material:
If you are not opposed to it, I recommend purchasing a leather item from goodwill or somesuch place that has a large enough area of smooth, flat material to cover your entire book (or most of it, wrapping around the spine at least, if you want to use other materials as well). The other recommended spine material is book cloth that is "backed" (has a paper layer on its underside that accepts the glue without letting it seep through) or "sized" (coated--soaked practically-- in some medium such as pva or paper sizing that essentially fills up all of the space between fibers but preserves some of the beauty -- though not the texture--of the cloth).
Basic steps:
Sew signatures onto tape supports. (another good procedure for the sewing frame)
PREPARE IN ADVANCE: 8+ signatures: stab an anchor hole at head and tail, then stab two holes for each tape, just over half-an-inch apart. Tapes are primary supports and should be spaced for stability (one at either end and then every 2-3 inches).
Apply initial layer of glue to spine.
Prepare cover boards and materials.
Round and Back the spine of your text block.
(....you might get this far on the first day...)
Create Headband/Endbands.
Prepare spine.
Attach Boards to Spine.
Attach Cover material.
Glue in Endpapers.(another significant material concern: the endpaper should be a relatively sturdy, glue-friendly piece of paper or leather or cloth. Normally, the backside of your endpaper will be visible, so it, too, should not offend. It's worth examining some well-made books in your library (or in the rare book room) to see how endpapers look and behave).
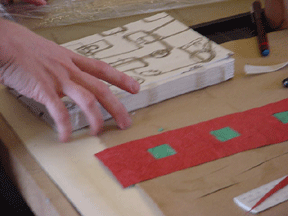
GALLERY:
please review the images, but do not regard them as instructions.
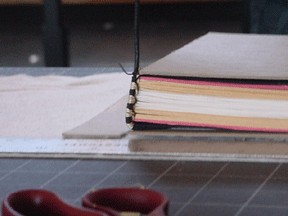
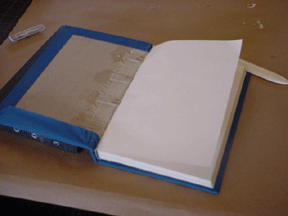
Views of finished books: full leather (above), full cloth (above right), and quarter leather (below). Notice the headbands.
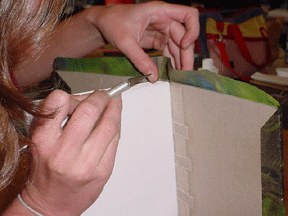
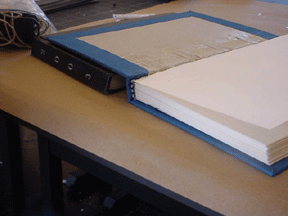
Above, the text block has been sewn and the spine glued once. This book will not be rounded and backed. The binder is preparing to apply the "super" (a stiff cheese-cloth type thing)
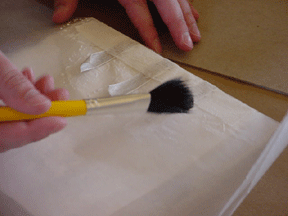
Glue is applied to the tapes and the super with waxed paper protecting the book block.
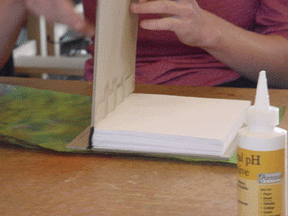
With the glue applied, the cover board can be set in place...
...and then pressed. We often have to improvise our weights and presses.
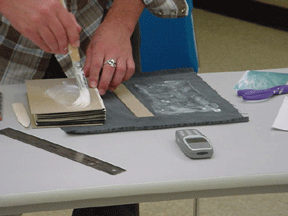
The spine above has been glued thoroughly and the super attached. Over the super, the binder then glued down some kraft paper, all of which helps to stiffen the spine and create some security on both sides of the glue.
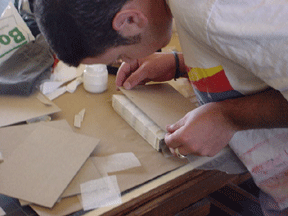
The binder has prepared his cover material and is preparing to cover one side. The strip of board in the center of his cloth will form a hard spine, an optional feature.
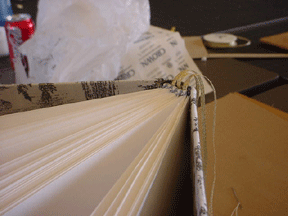
Close-up of a head band: threads wrapped around a core and stitched into the signatures.
This book is being wrapped in paper with a hard spine. After the front and back has been glued, the sides glued, then the top and bottom edges are folded down. This is a tricky maneuver at the spine, where one must "roll and stuff" the cover paper between the spine and the cover board. In the image above-right the binder is slitting the "super cloth" so that the paper can paste evenly behind the spine.
Here again, cover material is being wrapped around the boards
A slightly different approach is taken here, with the prepared spine material attached after the main boards have been covered. Above-right, the binder is "working the hinge" into proper shape.
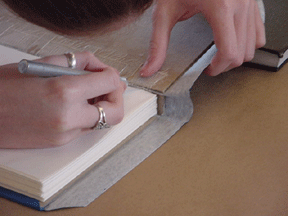
This book is being prepared for endpapers. The binder will clean up the hinge area and take measurements.