User Login |
Composting InformationGeneral Composting Information
Plans for Constructing Compost Bins
All of the previous information can be found in the Master Composter/Soil Builder Notebook that is distributed by WSU and Seattle Tilth.
Compost Bin with Arbor
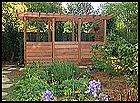
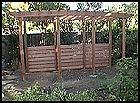
Composting is good for your garden and good for the environment, but most bins are not an attractive addition to your yard. For homeowners Chris and Jerry Kay, composting was also not convenient because they hid their bin in their side yard and didn't use it very often. They wanted an attractive bin placed in a more central location that would fit in well with their existing redwood deck and garden. So landscape designer Susan Ballinger designed an appealing compost bin made of redwood to complement the deck; the bin has an arbor and lattice sides. Three separate bins facilitate the stages of composting. Colorful plantings around the structure enhance the charming garden style. Ballinger says that a professional would charge about $2,500 for the custom-made compost bin, but do-it-yourselfers can buy the materials for only $900 (excluding the cost of plants). This project is rated a 3 on a difficulty scale of 1 (easy) to 5 (difficult) and requires basic carpentry skills and tools. It can be completed in one weekend with the help of friends.
Step One: Preparing the Site
Remove any plants or other materials to make room for the 4- by 12-foot structure. Mark where the posts will go, in two parallel rows of four posts, using a spare plank to line them up. Space the rows four feet apart, and mark a 10-inch diameter around each mark to outline the size of the post holes.
Step Two: Setting the Posts
Master carpenter Tim Rice of Rice Construction chose redwood posts that are decay-resistant and coordinate with the existing deck, but you can use cedar instead. Each 10-foot 4x4 redwood post costs about $20.
Dig the holes to two feet deep using a post hole digger. Starting with an end post, add one shovel of quick-setting concrete and set in the post. Shovel in more concrete until it's one inch above ground level. Do the same for the other end post. Once both end posts of one row are up, tie a string line between them to help line up the middle posts. Set up the middle posts and other row of posts in the same manner (figure A). Allow the concrete to cure for three to four hours.
Step Three: Adding the Arbor Roof
Cut off the tops of the posts at a consistent height of 7-1/2 feet. Next, take two 15-foot-long 2x8 beams and cut off the ends at an angle for a decorative touch. Hammer some nails partially into the top of the outside of one row of posts, and rest a beam on the nails, making sure the overhang is even. Attach the beam with 3" galvanized screws. Attach another beam to the outside of the second row of posts.
After the beams are in place, top them with 2x2 crosspieces, one at each end, secured with screws. Run a string line between the end crosspieces on each side to help you line up the rest of the crosspieces. Space more crosspieces about one foot apart between the two end pieces and attach with screws.
Step Four: Building the Bins
To build the back of the bins, use 12-foot-long 2x6s to span the back row of posts. Set a board on the ground against the back posts and secure with screws. Place another board on top using 1x1 spacers to allow for air flow and then attach the board with screws. Continue by stacking one board above another until you reach a height of three feet. Figure B shows the completed back panel.
For the front, first create guides so that the slats can easily slide in and out. Make the guides with two 1x1s, 2 inches apart, attached to all the sides of the posts that the slats will adjoin (figure C). Slide a scrap 2x6 between the guides to make sure they're wide enough apart. For the front removable slats, cut 2x6 slats to four feet long. Attach 1x1 spacers to each end of the slats so they won't rest right on top of each other, to allow for aeration. Then slide the slats between the guides, stacking them up to form the remaining sides of the three compost bins (figure D).
Step Five: Adding the Finishing Touches
Start with a pre-fab 4- by 8-foot sheet of redwood lattice. Use a circular saw to cut it in half and set each lattice panel against the inside of the end posts (figure E). Attach them with galvanized screws.
Planting: Around a Compost Bin
Ballinger has chosen flowering vines to add softness and greenery to the sides of the compost bin. Colorful annuals in the area around the bin coordinate with the rest of the garden. And hanging baskets of vivid flowers adorn the top of the arbor. The planting plan includes:
Tips for Successful Composting
To speed up the natural decomposition of materials, Ballinger says to bring together the right conditions to increase heat in the compost bin. Here are some other tips:
Information for this compost bin cames from: http://www.hgtv.com/hgtv/gl_soil_water_mulch/article/0,,HGTV_3634_139720...
Allyson Ruppenthal
categories [ Other ]
login or register to post comments | printer friendly version
|


