The default “compressor” in the After Effects Render Queue is Animation. This is a “lossless” compressor, meaning essentially that every pixel in every frame is recorded, yielding extremely large files. The Animation compressor is only advisable if you anticipate using the movie as a layer in another project or working with it in Premiere before final rendering.
For purposes of this class, you should be using the compressor H.264 when rendering. There are three flavors of H.264 that you have access to in the Render window Output Module. The first one doesn’t allow a high enough bit rate to give you a good resolution image. The other two provide higher bit rates that will make your movies look the way you intended them.
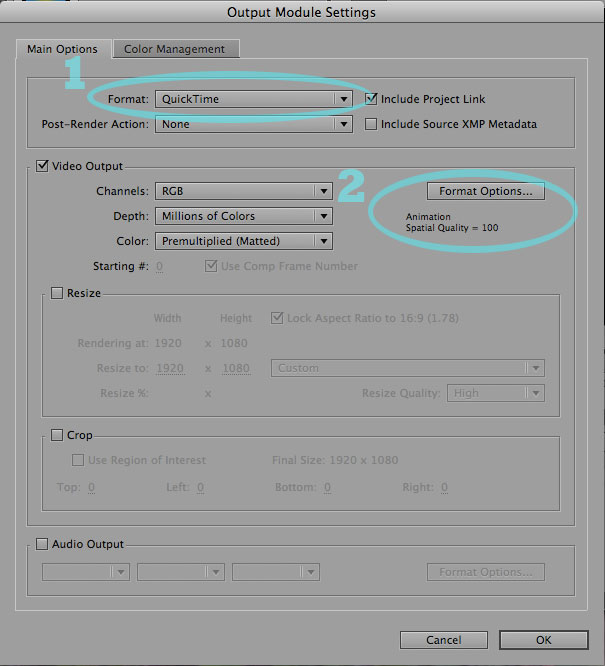
To find these compressors, click on the highlighted word “lossless” in the Output Module section of the Render Queue.
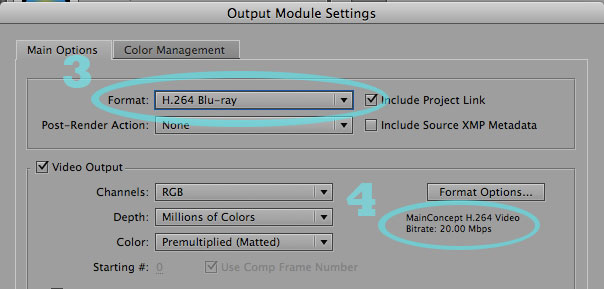
If you go through the first drop down menu with the default QuickTime (labeled “1” in the image above) and just select H.264, you’ll end up with a compressor that limits the bit rate to such an extent that your image may be extremely garbled. If you select H.264 Blu Ray, (labeled “3” in the image below) you will get a higher bit rate (see “4” below) that should work well for you. Choosing the H.264 compressor this way will give your movie a .mp4 file extension (or “wrapper”).
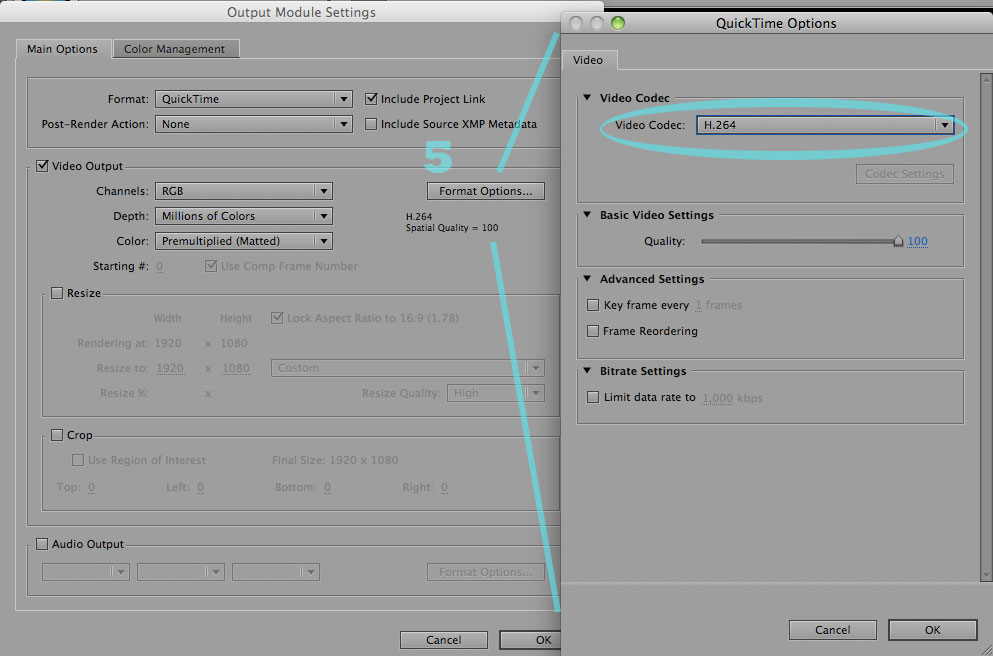
If you leave the first drop down menu at the default QuickTime but go to the one in the second layer, “Format Options”, (labeled “2” in the image above) and select the H.264 compressor from that menu, you will also get a compressor that will use a bit rate adequate to the needs of your sequence. In the image below, labeled “5” you can see that the box to limit data or bit rate is unchecked by default. That means that After Effects will calculate the bit rate needed based on the data within the image instead of imposing an arbitrary limit. Using this approach to designating the H.264 compressor will give your movie a .mov file extension.